Quick Info
Model
452
Estimated Cost
€0.00
Difficulty
Intermediate
Time Required
45 – 60 Minutes
Safety Notes
Paint Protection: The rear bumper is a large, awkward piece of plastic. Always place a soft blanket or carpet underneath the rear of the car to prevent scratching the paint once the bumper is removed.
Fragile Clips: The side glass panels and bumper tabs are made of plastic that can become brittle over time. Apply even pressure and avoid yanking the panels.
Wiring Harness: Never pull the bumper away forcefully without ensuring the license plate and rear light wires are disconnected; doing so can damage the electrical pins or tear the harness.
Two-Person Job: While possible to do alone, having a second person hold the opposite side of the bumper during the final detachment step prevents it from falling and twisting.
Step-by-Step Guide
Introduction
Removing the rear bumper on a Smart Roadster is a rite of passage for many owners, as it is the "gateway" to the engine bay. Unlike most cars where the bumper is just a cosmetic skin, the Roadster's rear assembly is integrated with the side wings and the rear glass hatch area.
To remove it correctly, you must follow a specific sequence that involves removing the side glass trim panels to reveal hidden bolts.
Whether you are planning to upgrade your exhaust, replace a faulty turbo, or simply want to give the engine a deep clean, knowing how to strip the rear end safely is a vital skill. This guide simplifies the factory procedure into five manageable stages, ensuring no screws are left behind and no plastic tabs are snapped.
Upper Fastener Removal
The first stage involves clearing the top mounting points. Open the rear glass hatch fully to reveal a row of eight Torx T30 screws running along the upper horizontal edge of the bumper. These screws are located directly under the weather seal. Carefully unscrew all eight fasteners and place them in a magnetic tray. These bolts provide the main structural support for the top of the bumper, and removing them allows the panel to begin flexing away from the chassis.


Side Glass Panel Detachment
To reach the hidden side bolts, you must remove the triangular side glass panels (or plastic covers). From inside the boot area, locate and remove the Torx screws securing these panels to the roll bar structure. Once the screws are out, gently lift the panels upward and outward to release them from their tracks. Setting these aside in a safe place is necessary because they cover the critical junction where the bumper meets the rear quarter panels.
Side and Lower Screw Clearance
Move to the rear wheel arches and locate three Torx T25 screws on each side that secure the bumper to the inner wheel liners. Next, use your Torx driver to remove the two screws hidden behind the side air vent mesh and the fasteners located at the very bottom edge of the bumper near the exhaust. Finally, find the three plastic push-pins on each side's lower corner and pull them out using a flathead screwdriver or trim removal tool.

Electrical and Grill Disconnection
Before the bumper can be fully removed, you must disconnect the electrical components. If your car is equipped with a Brabus-style center grill, unclip it to gain better access to the license plate illumination. Reach behind the bumper and carefully unplug the wiring harnesses for the license plate lights. If you find it difficult to reach the main rear light connectors, you can unscrew the light clusters themselves to give the wires more slack, though this is often optional if you have a helper.
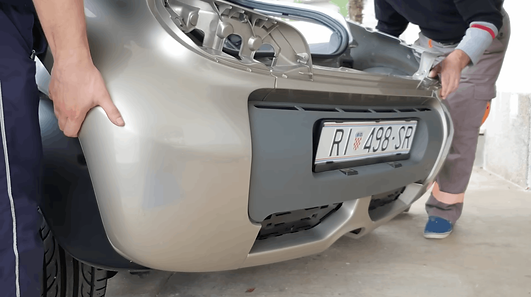
Final Detachment and Storage
With all fasteners removed and wires disconnected, stand at the rear of the car with a helper. Each person should grip a side of the bumper near the wheel arch. Gently pull the bumper straight back, away from the car, ensuring it clears the exhaust tip and the rear light housings. Once the bumper is free from its plastic guide rails, carefully carry it to your pre-prepared soft surface and lay it down flat to avoid any structural warping or surface damage.
