Quick Info
Model
450, 452
Estimated Cost
750-900€
Difficulty
Advanced
Time Required
2 - 4 Hours
Safety Notes
Professional Support Recommended: Suspension work directly impacts vehicle safety. If you are not confident with mechanical work, consult a professional.
Secure Lifting: Never work under a car supported only by a hydraulic jack. Always use heavy-duty jack stands placed on designated jacking points.
Tension Warning: Original springs are under significant tension. Use caution when loosening top mounts to prevent components from springing outward.
Alignment is Mandatory: Installing coilovers changes your car's geometry. A professional 4-wheel alignment is required immediately after installation to prevent dangerous handling and rapid tire wear.
Torque to Spec: All suspension bolts must be tightened to factory torque specifications. Loose bolts can lead to catastrophic suspension failure.
Step-by-Step Guide
Introduction
The Smart Roadster (452) and Fortwo (450) are often called "go-karts for the road," but while their lightweight chassis is a masterpiece of agility, the factory suspension is frequently the weakest link. After years of service, stock dampers lose their "bite," leading to a floaty ride, excessive nose-dive under braking, and a wheel gap that leaves much to be desired. While simple lowering springs can drop the car, they often compromise ride quality by overworking the original shocks.
Upgrading to Bilstein B14 Coilovers is the definitive solution for owners who refuse to compromise. This isn't just a lowering kit; it’s a complete motorsport-derived suspension overhaul. The B14 system features gas-pressure technology and mono-tube/inverted technology, providing consistent damping even under the extreme heat of a track day.
One of the most significant advantages of this setup is the incredible range of customization it offers your chassis. The threaded shock bodies allow for extreme versatility: whether you are building an "Adventure" style Smart and need to lift the car by up to 50mm for extra ground clearance, or you are chasing the ultimate "stanced" look and want to lower it by up to 65mm, the B14s provide the hardware to make it happen.
Beyond the aesthetics, this threaded height adjustment allows you to fine-tune your Smart’s center of gravity to the millimeter, eliminating factory "rake" and achieving a perfectly flush fitment with your wheels. Whether you are navigating tight mountain hairpins or looking to sharpen your daily commute, the Bilstein B14s provide a firm, yet sophisticated ride that finally matches the aggressive DNA of the Roadster and 450.
In this comprehensive guide, we move beyond basic maintenance into advanced tuning. We’ll walk you through the tear-down of the front struts, the installation of the rear performance springs, and the crucial final steps of height indexing and torquing—ensuring your Smart handles as sharp as it looks.
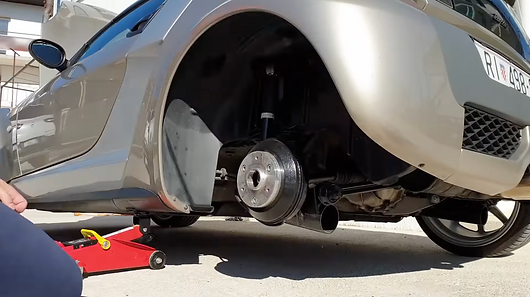
Front Strut Assembly & Removal
Jack up the front of the car and secure it on stands. Remove the wheels. From inside the front trunk, use a Torx T45 and a 21mm Wrench to loosen the top mount nut. Underneath, disconnect the brake lines and ABS sensors from the strut, then remove the lower bolts (15mm) securing the strut to the hub. Carefully remove the factory assembly from the vehicle.


Preparing & Fitting Front Coilovers
Assemble the Bilstein front units by sliding the height adjustment cup, bump stop, and dust cover onto the shock absorber. Place the main spring followed by the top spring cup and rubber donut. Position the new coilover into the vehicle, securing the top mount first to hold it in place. Align the bottom of the strut with the hub and reinstall the lower bolts, ensuring all lines are reattached to their brackets.
Rear Suspension Disassembly
Move to the rear of the vehicle, jack it up, and support the rear axle with a jack to prevent it from dropping suddenly. Remove the wheels. Undo the lower shock absorber bolts (15mm) and the upper mounting nuts. Slowly lower the jack supporting the axle to release the tension on the factory springs, then remove the original shocks and springs.

Installing Rear Springs & Shocks
Fit the Bilstein threaded height adjusters onto the lower spring seats of the axle. Position the new blue performance springs, ensuring they are seated correctly against the adjusters. Install the Bilstein B14 rear shock absorbers, starting with the top mount. Raise the axle with your jack to align the lower shock eyelet with the mounting hole and secure it with the bolt.
Final Height Adjustment
With all four units installed, put the wheels back on and lower the car onto a level surface. Use the provided C-spanners to turn the adjustment cups on the threaded shock bodies to set your desired ride height. Once the stance is perfect, torque all suspension bolts to factory specs (approx. 110-120 Nm for hub bolts). Perform a low-speed road test to check for noises before heading to a professional alignment shop.
